Overview
Articulate 360 supports seamless translation workflows using XLIFF files. Alexa Translations A.I. enhances this process with powerful neural machine translation (NMT) and advanced editing tools, ensuring accuracy and consistency.
This guide walks you through the process of exporting XLIFF files from Articulate Storyline 360 and Rise 360, translating them using Alexa Translations A.I., and re-importing the translated content back into Articulate.
Step 1: Export Your Course Content as an XLIFF File
Exporting from Storyline 360:
- Before exporting, duplicate your course to retain an original version.
- Open your duplicated project in Storyline 360.
- Navigate to the File tab, select Translation, and click Export.
- In the export window, select XLIFF as the export format.
- Click OK to save the XLIFF file to your computer.
Exporting from Rise 360:
- Before exporting, duplicate your course in Rise 360 to retain an original version.
- Open your duplicated course in Rise 360.
- Click Settings in the upper-right corner and select the Translations tab.
- Click Export XLIFF File.
- Ensure the checkbox for Include HTML formatting is selected. This helps maintain the structure and formatting of the translated content.
- Save the file to your computer.
For more details, refer to Articulate’s official guides:
Step 2: Translate the XLIFF File Using Alexa Translations A.I.
- Log in to Alexa Translations A.I.
- Go to Translate -> Document.
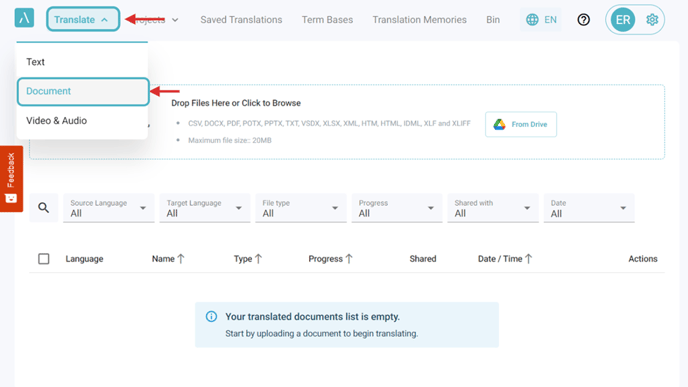
- Upload the XLIFF file exported from Articulate.
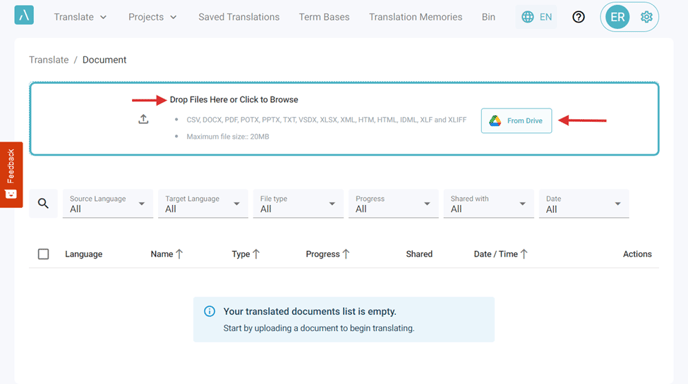
- Follow the Document Translation Steps
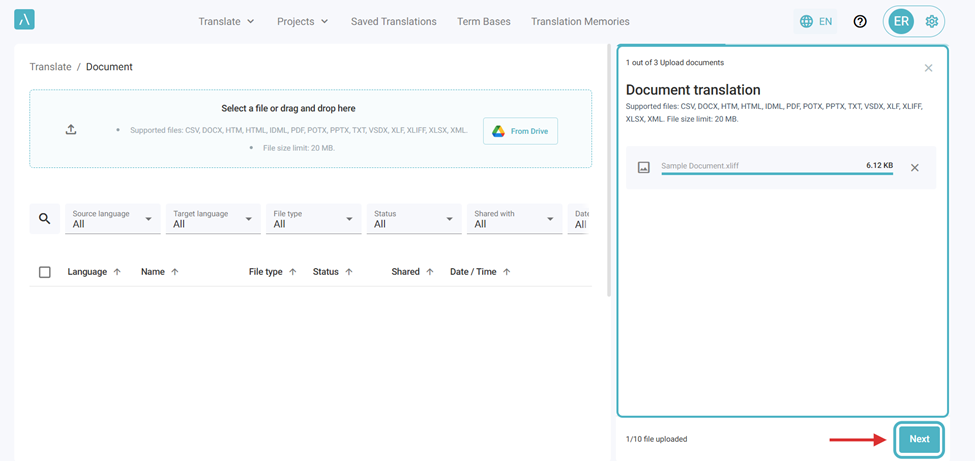
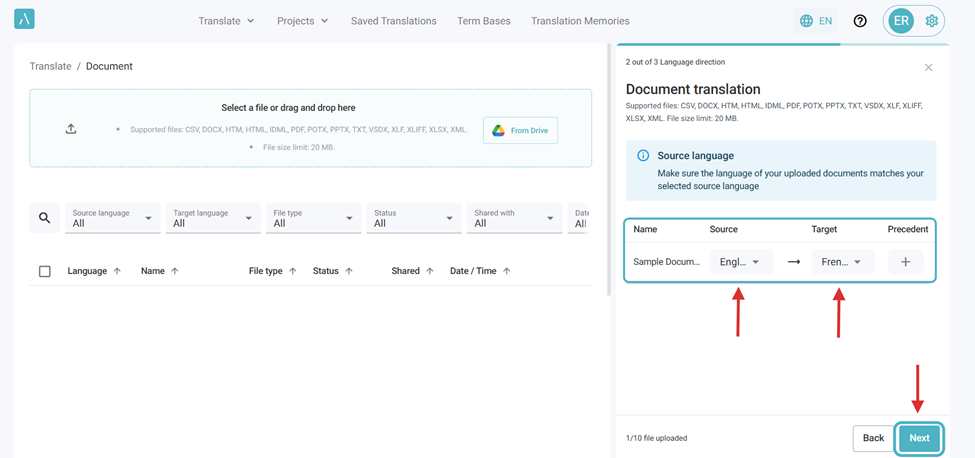
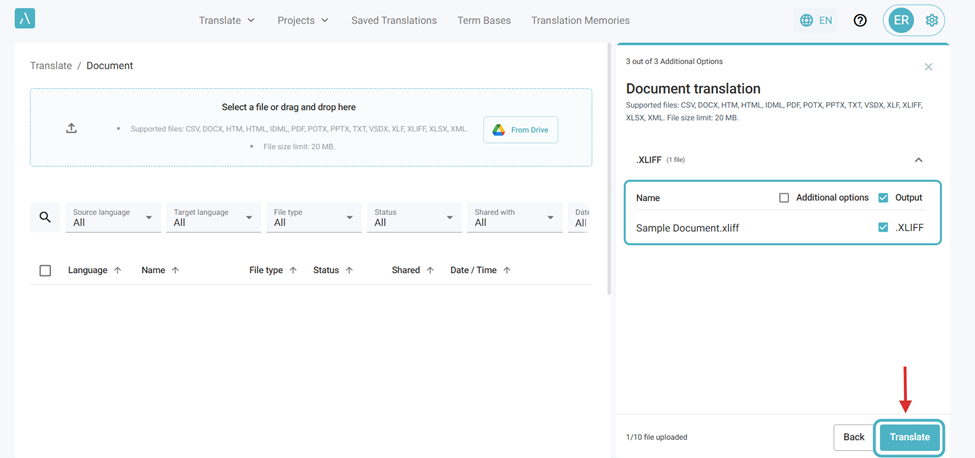
- Once the translation is complete, download the translated XLIFF file.
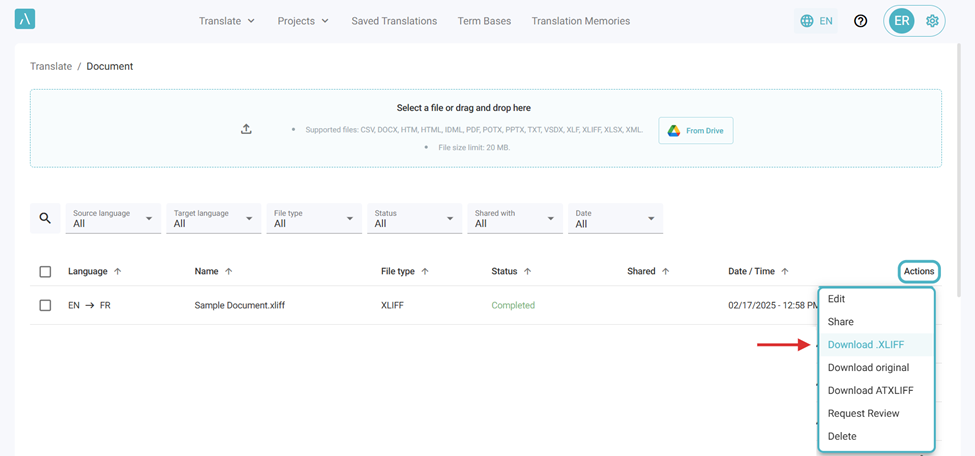
For a detailed guide on translating a document in Alexa Translations A.I., refer to our official knowledge base article: How to Translate a Document.
Step 3: Import the Translated XLIFF File Back into Your Course
Importing into Storyline 360:
- Open your original project in Storyline 360.
- Navigate to the File tab, select Translation, and click Import.
- Select the translated XLIFF file and click Open.
- Review the imported content to ensure correct formatting and alignment.
Importing into Rise 360:
- Open your course in Rise 360.
- Click Settings and go to the Translations tab.
- Click Import Translated Text, then select and upload the translated XLIFF file.
- Review the imported content to ensure accuracy.
If you have any questions or need more information, please contact ai_support@alexatranslations.com
